Quick Omnichannel Customer Service Setup in Dynamics
Creating a unified customer service platform can feel daunting. This guide provides a direct path for a quick live chat setup. Your goal is a functional omnichannel customer service setup in Dynamics. Customer expectations are high; 90% expect consistent service across all channels. We will walk you through the native Dynamics 365 omnichannel setup. You will learn how this powerful system works. We will also explore how an alternative solution like Sobot can streamline your path to a robust omnichannel experience for your customer service team.
Initiating the Omnichannel Customer Service Setup
Before you can configure chat channels, you must first enable the core application within your Dynamics environment. This initial omnichannel customer service setup involves confirming your licenses, provisioning the solution, and activating the app. Let's walk through these foundational steps.
Confirm Licensing and Permissions
First, you need to verify that you have the correct licenses. The Omnichannel for Customer Service application is an add-in for Dynamics 365 Customer Service. This means you must have the base Customer Service Enterprise license plus the necessary add-on for digital messaging. Your successful setup depends on having these in place.
Tip: 📝 You will also need Global Administrator permissions in your Microsoft 365 tenant to provision the application and provide consent on behalf of your organization.
Provision Omnichannel for Customer Service
With the right permissions, you can now provision the omnichannel application. This process installs the solution into your chosen Dynamics 365 environment. You will add the Omnichannel for Customer Service app from the Power Platform Admin Center.
Follow these steps to complete the provisioning:
- Go to the Power Platform Admin Center.
- Expand Resources in the left menu and select Dynamics 365 apps.
- Find Omnichannel for Customer Service in the list and select Manage.
- A new page will open. Select the environment where you want to install the service.
- Follow the on-screen prompts to add channels like Chat.
- Review your selections and select Finish to begin the installation.
Activate the Application
After the provisioning process completes, the final step is to activate the app. This action makes the Dynamics 365 Omnichannel tools visible and accessible to your users. The setup is not complete until you perform this step.
You can activate the application directly in Power Apps:
- Sign in to Power Apps and select the correct environment.
- Select Apps from the side menu.
- Find Omnichannel for Customer Service and select the ellipsis (...).
- Choose Activate from the menu.
Your omnichannel customer service setup is now provisioned and ready for configuration.
Configuring Your First Live Chat Channel
With the application active, you are ready to build your first customer-facing communication channel. This process involves creating the chat channel itself, customizing its appearance and behavior to match your brand, and finally, grabbing the code to place it on your website. This configuration is where your omnichannel strategy starts to take visible shape.
Create the Chat Channel
Your first step is to create the live chat channel inside the Dynamics 365 environment. This action generates the foundational record that will control your chat widget's settings and behavior.
You will perform this setup in the omnichannel admin center. Follow these steps to create your channel:
- In the site map, navigate to Customer support and select Channels.
- Under the Accounts section, find Messaging accounts and select Manage.
- On the Accounts and channels page, select New account to begin.
- Enter a name for your account. For the Channel type, select Chat.
- Follow the on-screen prompts to complete the initial setup. Once done, select Save and close.
Note: 📝 After creating the channel, you will link it to a workstream. The workstream defines how incoming chats are routed to agents. We will cover workstreams in the next section.
Customize the Chat Widget
A generic chat widget does not build customer trust. You need to customize it to create a seamless brand experience. This involves adjusting its appearance and setting up a pre-chat survey to gather essential information upfront.
Visual Design and Branding
You can modify several visual elements of the chat widget to align with your company's brand guidelines. This ensures a consistent look and feel for customers interacting with your website. Key customizations include:
- Theme Colors: Adjust the primary and secondary colors of the widget.
- Widget Position: Choose where the chat button appears on your page.
- Logo: Upload your company logo to be displayed in the chat window.
- Agent Display Name: Decide whether to show the agent's full name or a nickname.
For more advanced styling, you can use CSS to modify properties like the widget's size and font families, giving you granular control over its appearance.
Pre-chat Surveys
A pre-chat survey is a powerful tool for improving agent efficiency. It collects key details from the customer before the conversation begins. When designing your survey, focus on these best practices:
- Collect Only Necessary Data: Ask only for what you truly need. A customer's name and email are great starting points. For e-commerce, an order ID is invaluable.
- Identify the Inquiry Type: Allow customers to select a category for their issue (e.g., "Billing," "Technical Support"). This helps route the chat to the correct department.
- Obtain Explicit Consent: If you operate in regions like the EU, you must include a GDPR acceptance option. Always provide clear "I agree" and "I disagree" choices for data processing.
Retrieve the Widget Code Snippet
After you have configured your channel and customized the widget, the final step is to retrieve the code snippet. This piece of JavaScript is what makes the chat widget appear on your website.
You can find the code within your chat channel's settings:
- Open the chat channel you just created.
- Navigate to the Chat widget tab.
- In the code snippet section, select Copy to copy the entire script to your clipboard.
<script
    id="Microsoft_Omnichannel_LCWidget"
    src="[Your_Organization_URL]"
    data-org-id="[Your_Org_ID]"
    data-org-url="[Your_Org_URL]"
>
</script>
You can now paste this code snippet into the source code of your website, typically before the closing </body> tag. Once added, the chat widget will appear for your website visitors, ready to connect them with your service team.
Routing with Dynamics 365 Omnichannel Workstreams
An omnichannel customer service setup is incomplete without intelligent routing. You need a system to direct incoming conversations to the right agents. This is where workstreams, queues, and routing rules in Dynamics 365 Omnichannel become essential. A workstream acts as a container for your channel, defining how work items are distributed. Queues are virtual waiting rooms where conversations are held. Routing rules are the logic that sends those conversations to the correct queue.
This section will guide you through creating a workstream for your live chat channel, configuring a queue to hold incoming chats, and defining the rules that govern this entire process. By the end, you will have a fully functional routing system ready for your agents.
Create a Chat Workstream
A workstream is the engine of your routing setup. It connects your chat channel to your distribution logic. You will create a new workstream specifically for messaging and link it to the chat channel you configured earlier. This process involves defining key settings like capacity and agent presence.
To create your chat workstream, follow these steps in the omnichannel admin center:
- Navigate to Workstreams under the Customer support section in the site map.
- Select New workstream to open the creation dialog.
- Provide the necessary details for your workstream:
- Name: Give it a clear name, like
Website Live Chat Workstream. - Type: Select Messaging.
- Channel: Choose Chat from the list that appears.
- Work distribution mode: Select Push. This mode automatically assigns conversations to available agents.
- Name: Give it a clear name, like
- Select Create. Dynamics will create the workstream and display its configuration page.
Pro Tip: 💡 In the workstream's Work distribution settings, you can manage agent capacity. For example, you can set a rule that a single chat conversation consumes 30 capacity units. If an agent has a total capacity of 100, they can handle three concurrent chats, leaving 10 units free for other tasks. This ensures agents are not overloaded and can maintain service quality.
Configure an Omnichannel Queue
With your workstream created, you now need a destination for the incoming chats. An omnichannel queue is a container that holds work items waiting to be assigned to an agent. You will create a queue and add the users (agents) who will be responsible for handling conversations from that queue.
You can create a new queue directly from the admin center:
- Navigate to Queues under the Customer support section.
- Select New queue on the command bar.
- In the Create a queue panel, enter a Name for your queue, such as
General Support Chat Queue. - Set the Type to Messaging.
- Select Add users and choose the agents you want to assign to this queue.
- Select Create to finalize the queue.
This queue now acts as a dedicated pool for your support team. When a chat comes in and is routed here, any available agent within this queue can pick it up.
Define Routing Rules for the Setup
Routing rules are the "if-then" logic that directs work items to the correct queue. For your initial setup, you will create a simple rule that sends all incoming chats from your workstream to the queue you just configured. In Dynamics 365 Omnichannel, these are called "route-to-queue" rules.
A ruleset follows a simple format: 'If a defined condition is met, then route the work item to a specific queue.' Each workstream can have one route-to-queue ruleset. The system evaluates these rules to determine the best destination for each incoming conversation.
Here’s how to create a basic routing rule for your chat workstream:
- Open the workstream you created earlier.
- Under Routing rules, select the Route-to-queues ruleset.
- Select Create rule.
- In the Create rule dialog:
- Enter a Rule Name, like
Route All Chats to General Support. - In the Conditions section, you can define specific criteria. For a simple setup, you can create a condition that is always true or based on the channel.
- In the Route to queues section, select Add queue.
- Choose the
General Support Chat Queueyou created.
- Enter a Rule Name, like
- Select Create to save the rule.
By default, Dynamics uses a "hit-all" policy, which evaluates every rule. For more advanced scenarios, you can switch to a "hit-first" policy, which stops evaluation after the first matching rule is found. This is useful for creating a clear hierarchy.
As your needs grow, you can create more complex rules. For example, you could route chats based on:
- Customer Language: Direct Spanish-speaking customers to a Spanish-speaking queue.
- Urgency: Prioritize chats from "Gold" tier customers by sending them to a VIP queue.
- Inquiry Type: Route "Billing" questions from the pre-chat survey to the finance team's queue.
With your workstream, queue, and routing rule in place, your omnichannel chat channel is now fully configured. Incoming chats will be intelligently directed to the right team, ensuring a smooth and efficient customer experience.
An Alternative: A Faster Omnichannel Setup with Sobot
While the native Dynamics 365 process is powerful, it requires significant configuration. For businesses seeking a more direct path, you have another option. An alternative like Sobot simplifies the entire omnichannel setup, allowing you to deploy a robust customer service solution quickly. This approach prioritizes speed and immediate value, getting your team online faster.

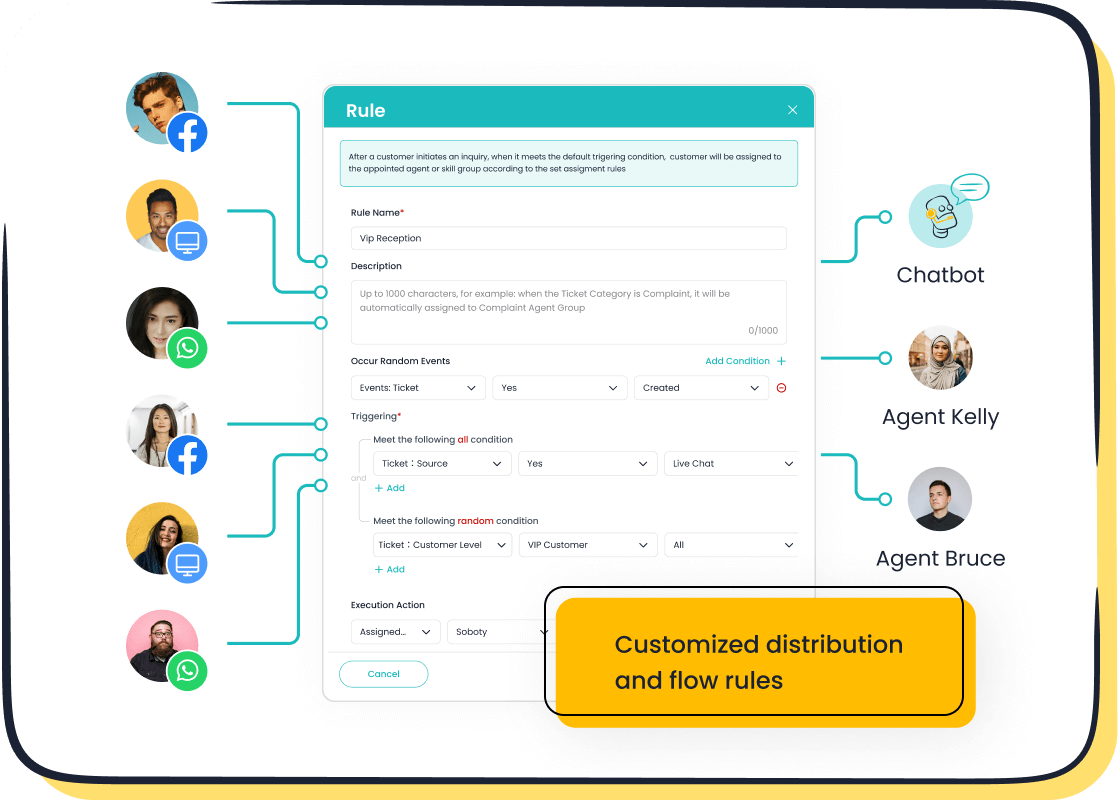
Integrating Sobot Live Chat
You can integrate a powerful live chat solution without the complex steps of a native build. With Sobot, the setup is streamlined. You begin by customizing the chat widget to match your brand’s look and feel. From there, you can assign agent roles and permissions. This simple process helps you turn website visitors into customers, with users seeing a proven 38% gain in conversion.
Tip: 💡 Sobot's intelligent assignment feature automates your workflow from day one, directing conversations to the right agent without needing complex routing rules.
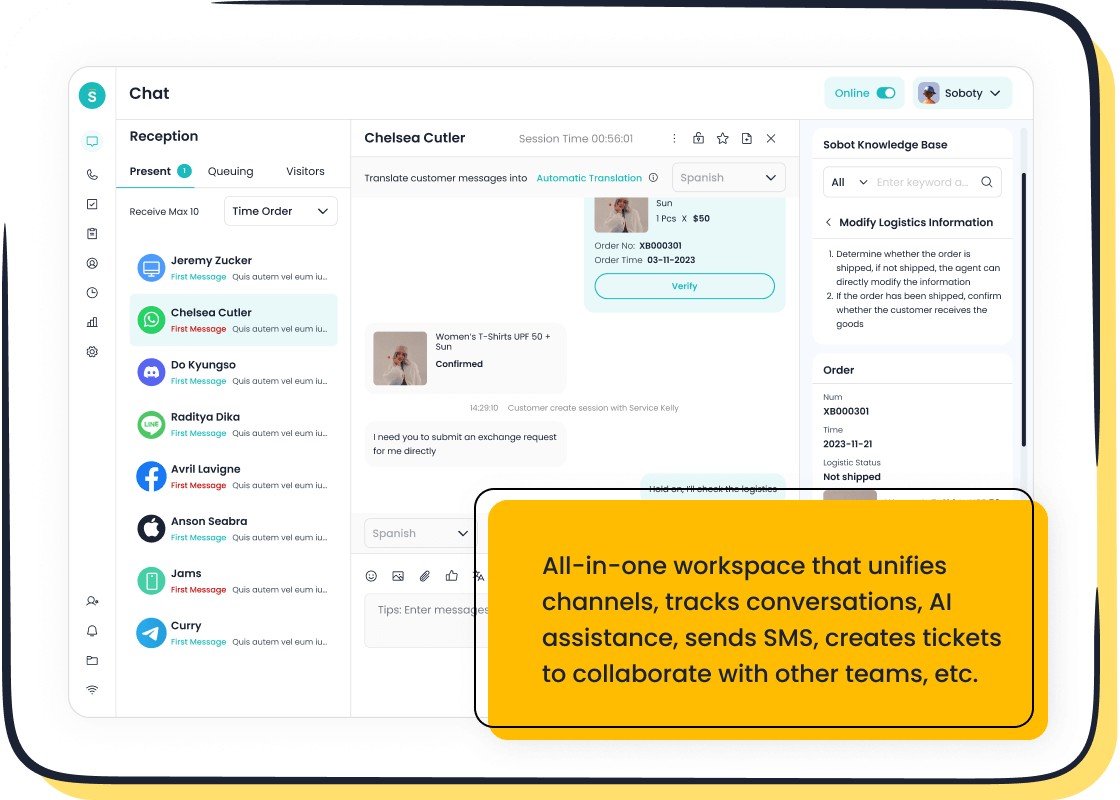
Leveraging a Unified Workspace
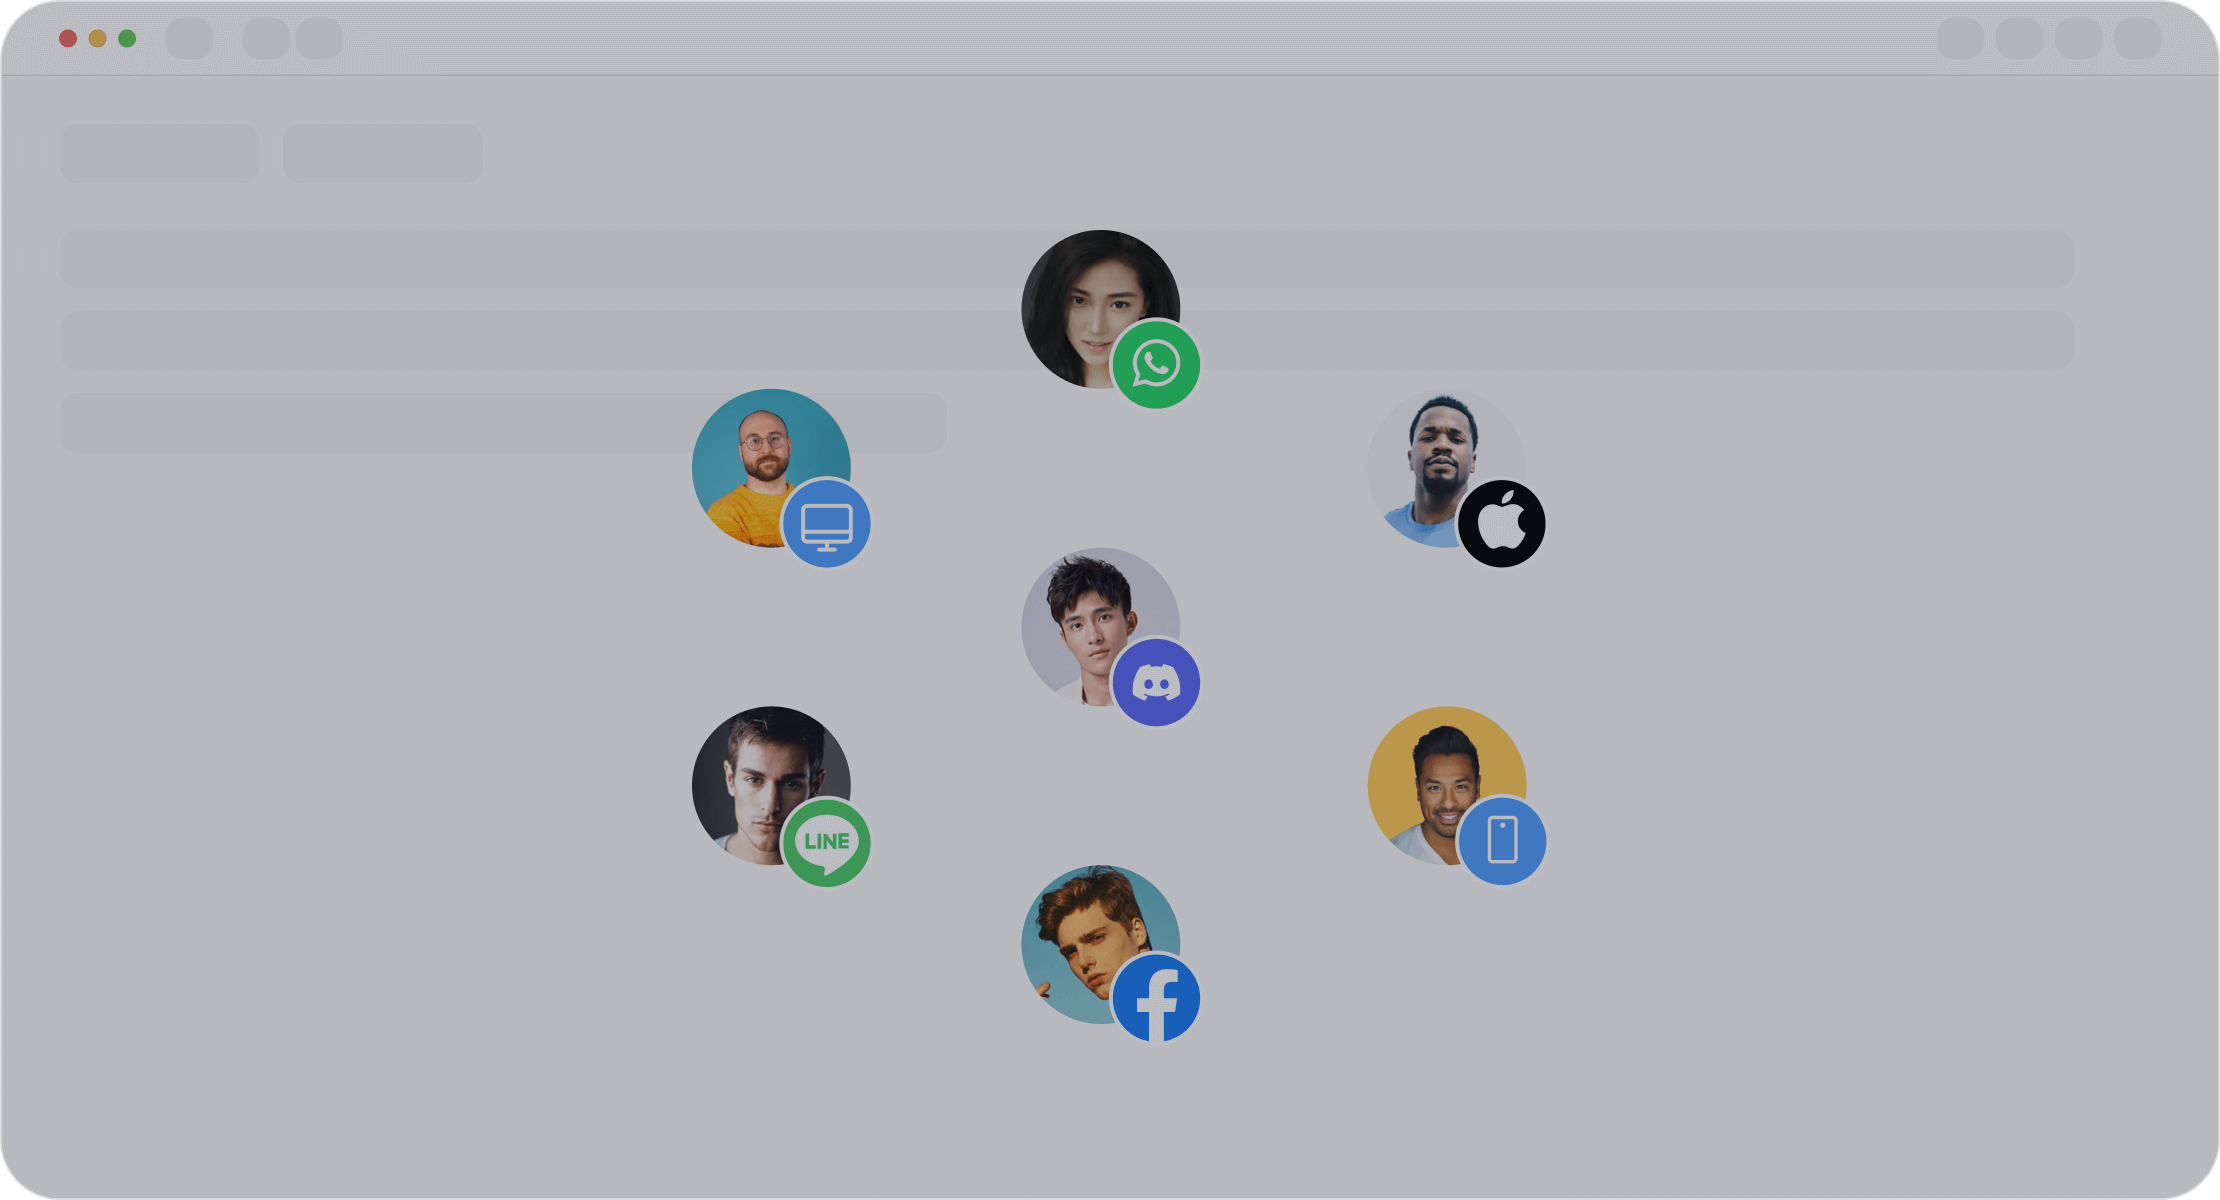
A key advantage of this approach is a truly unified omnichannel workspace. Instead of managing separate systems, your agents get a single inbox for all customer interactions. This includes channels like:
- Live chat and email
- Social media (Facebook, Instagram)
- Messaging apps (WhatsApp)
- Voice calls
This consolidation gives your team a complete view of the customer journey. AI-assisted tools analyze queries in real-time and suggest responses, helping agents resolve issues faster and deliver more personalized customer service.
Gaining Advanced Analytics
A successful omnichannel customer service setup depends on data. Sobot provides built-in analytics from the start, eliminating the need for a lengthy configuration. You gain immediate access to dashboards tracking over 150 key indicators.
| Metric Category | Key Indicators Available |
|---|---|
| Efficiency | Time to resolution, Average handle time, First contact resolution |
| Performance | Agent productivity, Resolution rate, Escalation rate |
| Satisfaction | Customer feedback (CSAT), Engagement rate |
This data empowers you to optimize your service and make informed decisions without delay.
Enabling Agents for Service
Your routing system is ready. Now, you must empower your agents to use it. This involves assigning the correct permissions, configuring their availability statuses, and familiarizing them with their new workspace. Proper setup here ensures your agents can deliver excellent customer service from day one.
Assign Agent Security Roles
Before your agents can handle any conversations, you need to grant them the right security roles. These roles give them access to the omnichannel application and its features. The assignment process follows the standard method for all security roles within your environment.
You must assign one of the following primary roles to your agents:
- Omnichannel agent
- Customer Service Representative
Note: 📝 All users, including agents and supervisors, should also have the 'Customer service app access' security role to ensure full functionality.
To assign these roles, you will navigate to the Power Platform admin center. From there, you can select the user and manage their security roles, adding the necessary permissions to enable them for service.
Configure Agent Presence
Presence statuses tell the system whether your agents are available to receive new work. You can manage these statuses to reflect your team's real-world availability. The system includes several default statuses that you cannot delete:
- Available
- Away
- Busy
- Busy - DND
- Offline
The system automatically sets the 'Inactive' status if an agent misses a notification. While you cannot edit the base statuses, you can create custom ones. For example, you could create a status called "In Training" and map it to the base "Away" status. This gives you more detailed insight into your team's activities.
Access the Agent Dashboard
Once logged in, your agents will spend their time in the agent dashboard. This is their command center for managing all customer service interactions. The dashboard provides a clear overview of their workload. Key components include:
- My work items: This shows all conversations an agent is actively handling.
- Open work items: This displays conversations waiting in the queues the agent is part of.
- Closed work items: This lists all conversations the agent resolved that day.
This organized view helps agents prioritize tasks and manage their conversations efficiently, ensuring a high level of service for every customer.
You have now completed the foundational omnichannel customer service setup in Dynamics. This process gives you a powerful system for customer service. A true omnichannel approach is vital for excellent customer service. Companies with strong omnichannel strategies retain 89% of their customers. This setup improves your service. For a faster deployment with advanced features, consider Sobot's Omnichannel Solution. It streamlines your path to a superior service experience. You can learn more about this powerful alternative on the Sobot website.
FAQ
What licenses do I need for Dynamics Omnichannel?
You need the Dynamics 365 Customer Service Enterprise license. You must also have the Digital Messaging add-on. These licenses are required to provision and activate the native omnichannel customer service features within your environment.
Why is a unified workspace important for agents?
A unified workspace gives your agents a complete customer view. It combines interactions from all channels like chat, email, and social media. This helps agents provide faster, more personalized support without switching between different applications.
How quickly can I set up Sobot Live Chat?
You can deploy Sobot very quickly. The setup involves customizing your widget and copying a simple code snippet to your website. This streamlined process helps you launch a powerful chat solution without complex configuration steps.
What is the purpose of an omnichannel queue?
An omnichannel queue acts as a virtual waiting area for customer conversations. You assign agents to specific queues. Routing rules then direct incoming chats to the correct queue, ensuring the right team handles the inquiry.
See Also
Your Essential Guide to Seamless Omnichannel Call Center Software Solutions
Implementing Omnichannel Contact Center Solutions: A 10-Step Strategic Blueprint
Achieving Excellence: Mastering Live Chat for Retail Customer Engagement
Elevate Your Support: Mastering Live Chat for Superior Customer Service
Leveraging Shopify Live Chat Effectively for Retail Customer Interactions